EZVIZ App for iPhone & iPad (iOS) - Download Latest Version
With the increasing need for home security solutions, EZVIZ, a leading provider of smart home security cameras, has made it easier to monitor your property through its intuitive mobile app. The EZVIZ App for iPhone and iPad enables you to access real-time video feeds, set motion detection alerts, control your devices, and much more—all from the convenience of your iOS device.
If you’re looking to install the EZVIZ App on your iOS device, this comprehensive guide will walk you through every step of the process, from downloading the app to setting up your security cameras. We will also provide troubleshooting tips to ensure your experience is as smooth as possible.
Why Use the EZVIZ App on iPhone and iPad?
Before diving into the installation process, let’s explore the main advantages of using the EZVIZ App on your iPhone or iPad:
Seamless Monitoring: The EZVIZ App allows you to keep an eye on your home or business from anywhere. Whether you're at work, on vacation, or just out shopping, you can always access live video feeds from your cameras.
Real-Time Alerts: Get notified instantly when motion is detected. The app sends push notifications, so you can respond to potential security threats right away.
Two-Way Audio: Many EZVIZ cameras come with built-in two-way audio, allowing you to communicate directly with people on the other side of the camera. This feature is particularly useful for talking to visitors or intruders at the door.
Simple Setup and Control: The app is designed for ease of use, with a straightforward interface that allows you to control and customize your cameras and settings effortlessly.
Cloud and Local Storage Options: Store video footage securely either on the cloud or through local storage like SD cards, ensuring you have access to recorded footage whenever needed.
System Requirements for the EZVIZ App
Before downloading the app, ensure your iPhone or iPad meets the following system requirements:
For iPhone & iPad:
Operating System: iOS 12.0 or later (supports iPhone, iPad, and iPod touch)
Storage: At least 100 MB of free space to install the app.
Internet: A stable Wi-Fi or mobile data connection is required for streaming video and receiving notifications.
Make sure your iOS device is up-to-date and has enough available storage to install the app and run it smoothly.
How to Install EZVIZ App for iPhone & iPad?
The process of downloading and installing the EZVIZ App on your iPhone or iPad is simple and quick. Below are the steps to get started:
Step 1: Open the App Store
On your iPhone or iPad, locate and open the App Store from your home screen.
Once the App Store is open, you’ll be able to search for apps, browse categories, and more.
Step 2: Search for the EZVIZ App
Tap on the Search tab at the bottom of the screen.
In the search bar at the top, type “EZVIZ” and press the search icon or hit the Enter key.
The search results will show various apps related to EZVIZ. The official app should be the first result.
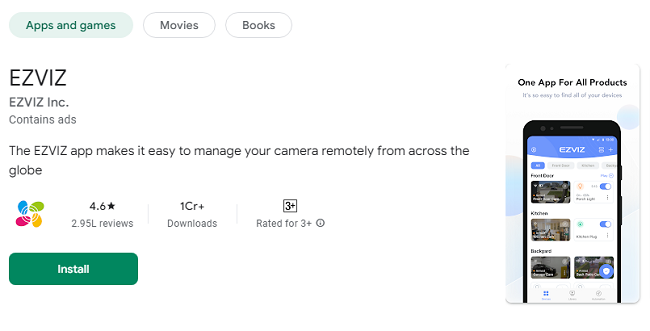
Step 3: Select the EZVIZ App
Look for the app called EZVIZ by EZVIZ Inc..
The app’s icon should display a white camera lens on a blue background, with the name "EZVIZ" underneath.
Tap on the app to go to its details page.
Step 4: Download and Install the EZVIZ App
On the EZVIZ App page, tap the Get button. If you have Face ID, Touch ID, or a password set up, you may be prompted to verify the download.
Wait for the app to download and install on your device. Once the installation is complete, the button will change to Open.
Step 5: Open the EZVIZ App
After installation, tap the Open button, or return to your Home screen and find the EZVIZ app icon. Tap on it to open the app.
Step 6: Sign Up or Log In to Your EZVIZ Account
When you first open the EZVIZ App, you will need to either create a new account or log into an existing one.
If you already have an EZVIZ account, simply tap Log In and enter your credentials (email and password).
If you don’t have an account, tap Sign Up to create a new account. You’ll need to enter a valid email address, create a strong password, and agree to the terms of service.
Step 7: Add Your EZVIZ Devices
Once you’ve logged in, it’s time to add your EZVIZ devices (cameras, doorbells, or other security products) to the app.
Tap the + (plus) icon located at the top right corner of the screen.
Follow the on-screen instructions to add your device. You may need to scan a QR code on the device or enter its serial number.
Ensure that your camera or device is powered on and connected to a stable Wi-Fi network for easy setup.
After the device is added, you’ll be able to monitor the live feed, configure camera settings, and set up alerts directly from your iPhone or iPad.
How to Configure Your EZVIZ App Settings on iPhone & iPad?
Once the EZVIZ App is installed and your devices are connected, it’s important to configure the settings according to your needs. Here are some essential configurations you can make:
1. Enable Motion Detection Alerts
Motion detection alerts are one of the most crucial features of the EZVIZ App. This feature lets you know immediately if there is any movement detected within your camera’s viewing area.
In the EZVIZ App, select the camera you want to set up.
Tap on the Settings icon (usually represented by a gear icon).
Under the Motion Detection settings, toggle the switch to enable the feature.
Adjust the sensitivity of motion detection, and if desired, set specific areas of the screen for motion detection (e.g., excluding areas where trees or traffic may trigger false alerts).
Enable push notifications to receive alerts when motion is detected.
2. Set Up Two-Way Audio
The two-way audio feature is available on many EZVIZ cameras. This allows you to listen and speak to anyone in the camera’s view.
Open the live feed for the camera that supports two-way audio.
Tap the microphone icon to enable audio.
Hold the microphone icon to speak, or simply listen to what’s happening in the camera’s field of view.
3. Customize Video Storage Options
You can choose to store your video footage either in the cloud or on local storage via a microSD card.
Open the Settings menu.
Tap on Storage Settings.
Select whether you want to use Cloud Storage or Local Storage. If you’re using an SD card, ensure it is properly inserted into your camera.
Follow the prompts to finalize your storage settings.
4. Set Up Schedules for Your Camera
If you don’t want your camera to record or send alerts 24/7, you can set up schedules to only activate at certain times.
Navigate to Camera Settings.
Tap Scheduling.
Set the start and end times for when you want the camera to monitor activity.
Troubleshooting the EZVIZ App on iOS
If you experience issues with the EZVIZ App on your iPhone or iPad, here are some common troubleshooting steps:
1. App Not Installing
Check Your Internet Connection: Ensure your device is connected to Wi-Fi or mobile data.
Clear Cache: Go to Settings > General > iPhone Storage, find the App Store app, and tap Offload App to clear the cache. Then try downloading the EZVIZ App again.
2. App Crashing or Freezing
Restart Your Device: A quick restart can often fix temporary glitches in the app.
Reinstall the App: If restarting doesn’t work, try uninstalling the app and reinstalling it from the App Store.
3. Camera Not Connecting
Check Wi-Fi: Ensure your camera is connected to the same Wi-Fi network as your iPhone or iPad.
Reset the Camera: If your camera is still not connecting, reset it to factory settings and try adding it again through the app.
Conclusion
Installing the EZVIZ App on your iPhone or iPad is the first step towards gaining control over your home or business security system. With its intuitive interface, remote monitoring, motion detection alerts, and two-way audio capabilities, the EZVIZ App allows you to keep your property safe, no matter where you are.
By following the easy steps outlined in this guide, you can quickly download, set up, and configure the EZVIZ App on your iPhone or iPad. Whether you’re a new user or a seasoned smart security professional, the app provides everything you need for peace of mind.
Trending Now
Updates