EZVIZ for PC - Free Download on Windows 7/8/10/11 & Mac
The EZVIZ App is a popular mobile application that connects users to their EZVIZ smart cameras, offering features such as real-time video streaming, motion detection alerts, and remote access. While it is primarily designed for smartphones and tablets, many users prefer to access their security footage and manage their EZVIZ devices from a larger screen. If you want to use the EZVIZ App on a PC (Windows or Mac), you're in the right place. In this guide, we'll walk you through the step-by-step process of downloading and installing the EZVIZ App on both Windows and Mac devices.
Why Use the EZVIZ App on Computer or Laptop?
Before diving into the installation process, it’s worth considering the benefits of using the EZVIZ App on your PC:
Larger Screen: Monitoring your security cameras on a larger PC screen allows for better visibility and easier navigation compared to mobile devices.
Convenience: You can manage multiple cameras and devices simultaneously with more ease, making it a great option for both home users and business owners.
Enhanced Productivity: For users managing security systems for multiple properties or large spaces, using the EZVIZ App on a PC improves efficiency with a bigger, more organized interface.
Requirements to Download EZVIZ App for Windows & Mac
Before starting the installation, it's essential to ensure your PC meets the necessary requirements:
For Windows:
Operating System: Windows 7 or later
RAM: Minimum 2GB (4GB recommended)
Hard Drive Space: At least 200MB of free space
Internet Connection: A stable internet connection for real-time video streaming and remote access
For Mac:
Operating System: macOS 10.12 (Sierra) or later
RAM: Minimum 2GB (4GB recommended)
Hard Drive Space: At least 200MB of free space
Internet Connection: A stable internet connection is required for live streaming and device management
Now that you know the system requirements, let's move on to the actual installation steps.
How to Download & Install EZVIZ App for PC Windows?
While the EZVIZ App doesn’t have a dedicated Windows version, you can easily install it on your PC by using an Android emulator. Emulators allow you to run Android apps on your Windows computer as if you were using an Android device.
Here’s how to download and install the EZVIZ App for PC using an Android emulator:
Step 1: Download an Android Emulator
The first step is to download an Android emulator. Popular emulators include:
BlueStacks: One of the most popular and user-friendly Android emulators for Windows.
NoxPlayer: Another great alternative for running Android apps on PC.
LDPlayer: Known for its smooth performance and compatibility with various apps.
For this guide, we'll use BlueStacks, but the process is similar for other emulators.
Go to the BlueStacks website: https://www.bluestacks.com
Click on the "Download BlueStacks" button.
Once the installer file is downloaded, open it and follow the on-screen instructions to install BlueStacks on your PC.
Step 2: Set Up BlueStacks
Once BlueStacks is installed:
Open the BlueStacks emulator.
Sign in with your Google account (you can create a new one if necessary).
Once logged in, you'll have access to the Google Play Store, just like on an Android device.
Step 3: Install the EZVIZ App
In the BlueStacks emulator, open the Google Play Store.
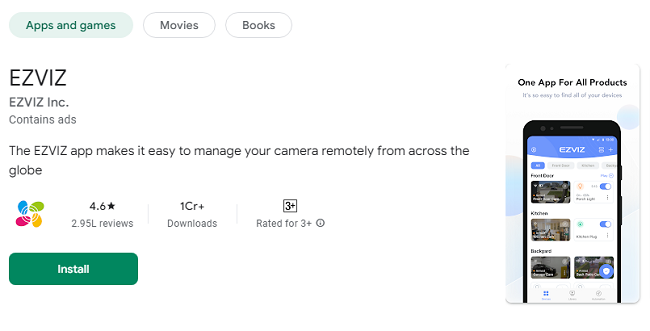
Search for "EZVIZ" in the search bar.
Click on the EZVIZ App from the search results and then click "Install".
The installation will take a few moments. Once installed, you can launch the EZVIZ App from the BlueStacks home screen.
Step 4: Set Up the EZVIZ App
Open the EZVIZ App on BlueStacks.
Log in to your EZVIZ account or create a new one if you don’t have an account yet.
Add your EZVIZ cameras or devices by following the in-app instructions.
Once set up, you can view live footage, adjust camera settings, receive motion alerts, and more, directly from your PC.
How to Download & Install EZVIZ App on Mac?
Mac users can also install the EZVIZ App through an Android emulator. However, macOS users have the added advantage of being able to run iOS apps natively through the App Store on newer Mac models. If you prefer to use the EZVIZ App directly on macOS, we’ll show you both methods.
Method 1: Using an Android Emulator on Mac (Similar to Windows)
For users who prefer to use an Android emulator, the steps are very similar to the Windows installation process. We’ll use BlueStacks as an example.
Step 1: Download BlueStacks for Mac
Go to the official BlueStacks website: https://www.bluestacks.com.
Click on the "Download BlueStacks" button for Mac.
Once the download is complete, open the installer and follow the on-screen instructions to install BlueStacks on your Mac.
Step 2: Set Up BlueStacks
After installation, open BlueStacks.
Sign in to your Google account (or create a new one).
Once signed in, you’ll have access to the Google Play Store and can download apps.
Step 3: Install the EZVIZ App
In BlueStacks, open the Google Play Store.
Search for "EZVIZ."
Click Install on the EZVIZ App.
Wait for the installation to complete, and then open the app.
Step 4: Set Up the EZVIZ App
Log in with your EZVIZ account.
Add and manage your devices, just like you would on a mobile device.
Start monitoring your security cameras and receiving alerts directly from your Mac.
Method 2: Using the Mac App Store (For macOS 11 and Later)
For newer versions of macOS (macOS 11 and later), you can try using iOS apps on your Mac without the need for an emulator. If the EZVIZ App is available on the Mac App Store, this method allows you to install it directly.
Step 1: Open the Mac App Store
Open the Mac App Store on your Mac.
Use the search bar to look for the EZVIZ app.
Step 2: Install the EZVIZ App
If available, click on the EZVIZ App from the search results.
Click Get and follow the on-screen instructions to download and install the app.
Step 3: Set Up the EZVIZ App
Open the EZVIZ App once it’s installed.
Log in to your EZVIZ account and configure your cameras and devices.
You can now view live video, set up alerts, and manage your security system right from your Mac.
Using EZVIZ Web Portal (Alternative Method)
While the EZVIZ App is primarily designed for mobile devices, another way to manage your devices on a PC is through the EZVIZ web portal. This is an alternative to using the mobile app and emulator. You can access your camera feeds, view recorded footage, and manage your devices directly via a web browser.
Visit the EZVIZ website: https://www.ezvizlife.com
Log in to your EZVIZ account.
From the dashboard, you can view live video, playback footage, and manage device settings.
This option is particularly useful for users who want to access their devices without the need for third-party software.
Troubleshooting EZVIZ App on PC and Mac
If you run into issues while using the EZVIZ App on your PC or Mac, here are some common troubleshooting steps:
App Not Installing: Ensure that your emulator is updated to the latest version. Check your internet connection as well.
App Not Responding: Restart the emulator or your PC/Mac to resolve performance issues.
Camera Feeds Not Displaying: Verify that your cameras are properly connected to the internet and that your EZVIZ account is set up correctly.
App Crashes: Update your emulator, the EZVIZ App, and your operating system to the latest versions.
Conclusion
Installing the EZVIZ App on your PC (Windows or Mac) is a great way to enhance your home or business security by utilizing a larger screen for real-time monitoring. Although the app is not natively available for desktop devices, you can easily run it using an Android emulator or, in some cases, directly through the Mac App Store. By following the steps outlined in this guide, you'll be able to download, install, and set up the EZVIZ App on your PC or Mac in no time. Whether you're at home or on the go, the EZVIZ App offers the flexibility you need to stay connected to your security system from any device.
Trending Now
Updates